JavaScript Editor
JavaScript Debugger
JavaScript Editor
JavaScript Debugger|
| ||
After you've created an application, you can use Visual Basic to create a Windows Installer file—an .msi file—to install it. All you need to do is to transfer the .msi file to the target machine—a desktop, a notebook, or a Web server—and double-click it to install it, provided that the target machine supports the Windows Installer and the .NET framework so your application can function. You can create .msi installer files with Setup and Deployment projects in Visual Basic.
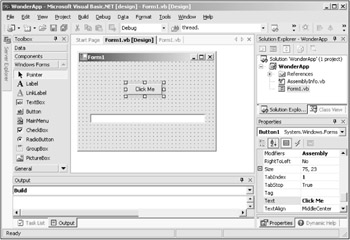
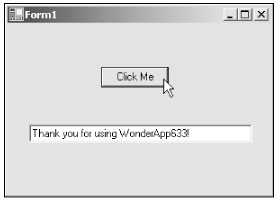
Let's see an example. In this case, I'll create an installer for an application named WonderApp, version 6.33, which you can see under design in Figure 25.12. When the user clicks the "Click Me" button, this application simply displays "Thank you for using WonderApp633!" in the text box, using this code:
Private Sub Button1_Click(ByVal sender As System.Object, _
    ByVal e As System.EventArgs) Handles Button1.Click
    TextBox1.Text = "Thank you for using WonderApp633!"
End Sub
That's all there is to the WonderApp application. To create the executable file to distribute, select the Build|Build menu item now, building WonderApp.exe, which is the executable file we'll actually deploy.
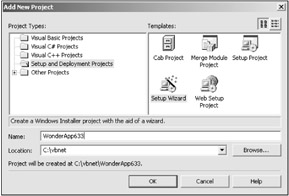
Now we're ready to create an installer file for WonderApp, which I'll call WonderApp633.msi. To do that, select the File|Add Project|New Project menu item, opening the Add New Project dialog you see in Figure 25.13. Select the "Setup and Deployment Projects" icon in the Project Types box, and the Setup Wizard icon in the Templates box, as you see in the figure. The Setup Wizard lets you create deployment projects in the easiest possible way (although you also can create deployment projects directly, using the deployment project templates you see in Figure 25.13).
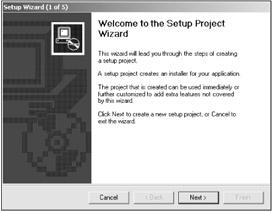
Give the new project the name WonderApp633, as you see in Figure 25.13, and click OK to open the Setup Wizard, as you see in Figure 25.14.
Click Next to move to the second pane in the Wizard, as you see in Figure 25.15. As you can see in that figure, the Setup Wizard allows you to create different types of deployment projects, including those for Windows and Web applications.
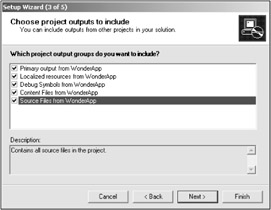
In this case, select the "Create a setup for a Windows application" radio button, and click Next to open the third pane in the Setup Wizard, as you see in Figure 25.16. In this pane, you specify what you want to deploy. For example, you can deploy just the program itself, or the program and its source code, and so on. In this case, let's deploy the works—everything in the WonderApp application—by selecting all items, as you see in Figure 25.16.
Then click Next to go on to the fourth pane of the Setup Wizard, as you see in Figure 25.17. In this pane, you can include other files to be deployed, such as readme.txt files, licensing agreements, and so on.
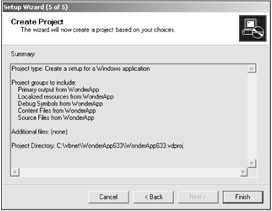
We won't include any other files with the deployment package here, so just click Next to bring up the fifth pane of the Setup Wizard, as you see in Figure 25.18. This is the last pane of the Setup Wizard, so to create the installer file we'll use, click Finish.
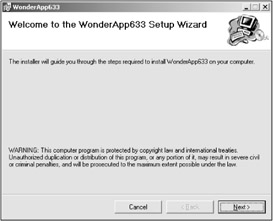
When the setup project is created, select the Build|Build Solution menu item; this creates WonderApp633.msi for us, and that's the file you use to deploy WonderApp. To deploy the application, you copy WonderApp633.msi to the target machine. Double-clicking that file opens the Windows installer, as you see in Figure 25.19.
| Tip |
To set the name of the application that the Windows installer displays as it installs, select the setup project in the Solution Explorer and set its ProductName property. You also can set the Manufacturer property to the name of your company. |
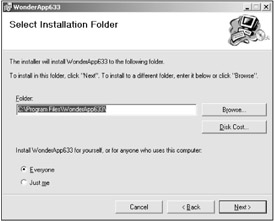
Click Next in the Windows installer to move on to its second pane, which lets you specify where to install the application, as you see in Figure 25.20.
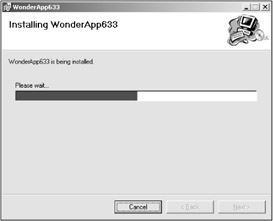
Clicking Next installs the application, as you see in Figure 25.21.
Now you can double-click the newly installed WonderApp.exe to run it, as you see in Figure 25.22.
And that's it—we've created an installation package and installed it. The process is similar for creating .msi files for Web applications—in that case, you select the "Create a setup for a Web application" option in the second pane of the Setup Wizard instead of the "Create a setup for a Windows application" option.
And now I'll turn to the Immediate Solutions section of the chapter for more details.
|
| ||
Free JavaScript Editor
JavaScript Editor