JavaScript Editor
JavaScript Debugger
JavaScript Editor
JavaScript Debugger|
| ||
In the previous topic, we got our start with menus, creating simple menu items. You also can create submenus, which involves giving menu items to menu items. When a menu item has a submenu, a right pointing arrow appears in that menu item at run time, as you see in Figure 9.1. Clicking that arrow opens the submenu, displaying additional menu items. And submenus can have submenus, which can have other submenus, and so on.
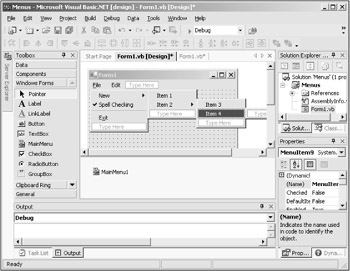
It's easy to create submenus—you just create the menu item you want to add a submenu to, then select it in a form designer. Doing so opens a "Type Here" box to the right of that menu item; you can enter the captions for the submenu items, as you see in Figure 9.13. Selecting the first item in the submenu opens a "Type Here" box for the next item under it, as well as another "Type Here" box for a new submenu to the right of it. All you have to do is to enter the caption of the submenu items you want, then double-click them to open their Click event in the matching code designer.
For example, you can add code to display a message box when a menu item is selected, like this:
Private Sub MenuItem6_Click(ByVal sender As System.Object, _
    ByVal e As System.EventArgs) Handles MenuItem6.Click
    MsgBox("You clicked my favorite item!")
End Sub
To see this in action, take a look at Figure 9.1, which shows how the submenus work in the Menus example on the CD-ROM.
|
| ||
Free JavaScript Editor
JavaScript Editor